Category Archives: Tutorials

Graphic t-shirt dress

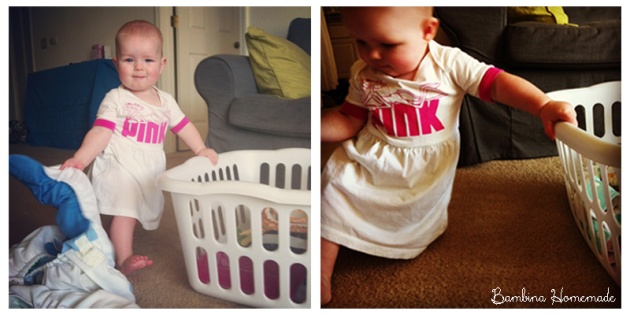
Now that Summer has officially left town (this morning’s snow showers should confirm it), I guess I should show you how I made this cute summery dress.  You might make one with long sleeves for your little sweetie and then pair it with some cute leggings, or maybe you can plan ahead for the next warm season.

First, grab a graphic tee you want to convert.

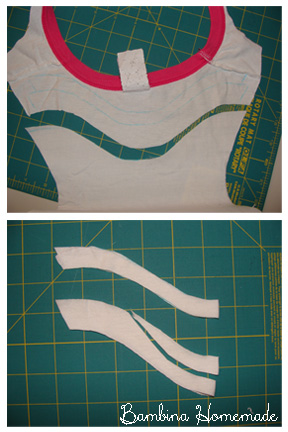
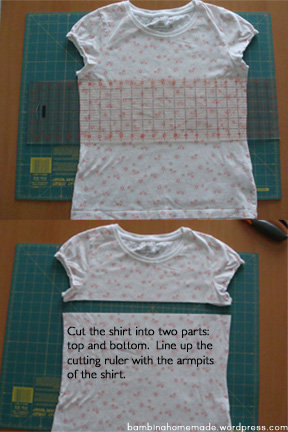
I wanted to make this an envelope shoulder style dress, since Bambina still hates having tight tops pulled over her head.  See the pic below for how I cut the main bodice piece (front and back) and skirt section.

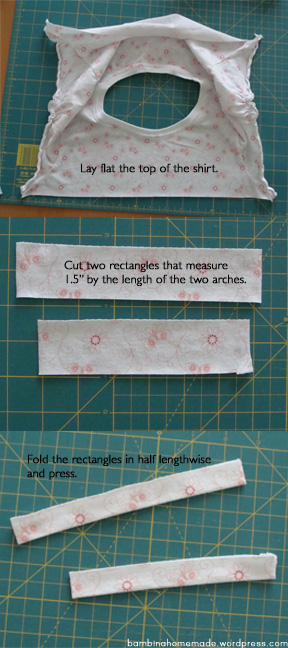
You’ll need some facing along the neckline.  Use the top of the bodice as a guide to cut two pieces that are each about an inch tall.   Fold them in half, and cut one of them more deeply at the center.

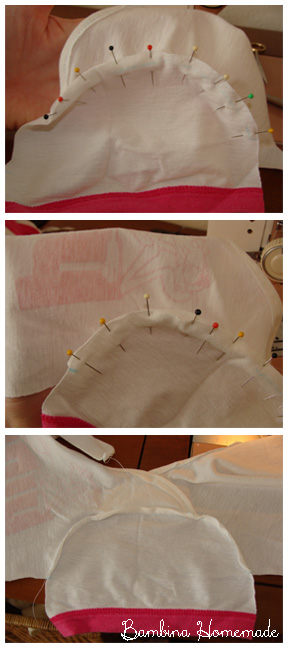
Harvest the sleeves from the shirt.  Fold over the shoulder overlap at your desired height.  Lay a sleeve with its top fold aligned with the shoulder fold, under the bodice by at least half an inch.  Trace the edge of the bodice armhole onto the sleeve, including a quarter inch down the side (this little line is critical – it will tell you where to align the bodice when you’re attaching them).  Cut the sleeve leaving a quarter inch seam allowance along the curve of the armhole and then going straight from there.  Copy the curve and the little line to the other side of the sleeve.  Use the first sleeve as a template to make the second.  Make sure you copy your markings as well!

Attach the facing to the bodice.  The more deeply cut piece will be attached to the front.  Turn them right sides together.  Match the top of the shoulders and smooth the facing piece down and towards the center.  Pin in place, and stitch with an 1/8″ seam allowance along the top of the facing.  Trim the excess of the bodice off from above the facing.  Turn the seam right sides out and topstitch the facing down using a 3/8″ seam allowance.  Repeat on the back, except without any trimming (the facing should line up with the top of the back exactly).

Sleeves.  Yeah, attaching sleeves to overlap/envelope shoulders is a pain.  But you can do it.  First we do the back bodice piece.  Right sides together, line up the corner of the armhole  with the end of your mark on one side of the sleeve.  Pin it along the edge until you reach the top edge of the bodice piece.  Now, line up the corner of the armhole of the front bodice piece with the other end of the mark on the sleeve and pin it together.  The overlap will appear as you pin, creating a sleeve – back bodice – front bodice sandwich.  Stitch between the marks.

Close the bodice, front to back.  Fold the bodice right sides together and pin along the sides and the underpart of the sleeves.  Stitch the sides and sleeves in one long seam on each side.  Clip the inner corners of the underarms.

Putting it all together.  Measure across the bottom of the bodice.  Double this measurement and cut this length of 1/4″  elastic.  Pin the ends of the elastic to one side seam of the skirt, and then pin the elastic equally around the top of the skirt in several places.  Attach the elastic to the skirt using a long zigzag stitch, and pulling the elastic taut as you run it and the skirt through your machine.  (Don’t stretch the skirt – just pull the elastic so its length matches the fabric of the skirt.)   Insert the bodice (right side out) into the skirt (inside out) – they will be turned right sides together with the waist of the bodice meeting the elastic edged waist of the skirt.  Pin them together at the waist and stitch around, again using a long zigzag, and making sure they are even as they go through the machine.

Turn it all right side out.  Done!  Admire your work!

4 ways to use up the rice left in your pantry when you go grain-free

I’ve recently discovered how much better I feel when I don’t eat grain.  But what to do with all that rice that was left in the pantry?   Glad you asked!  Here are the four uses I’ve found so far…

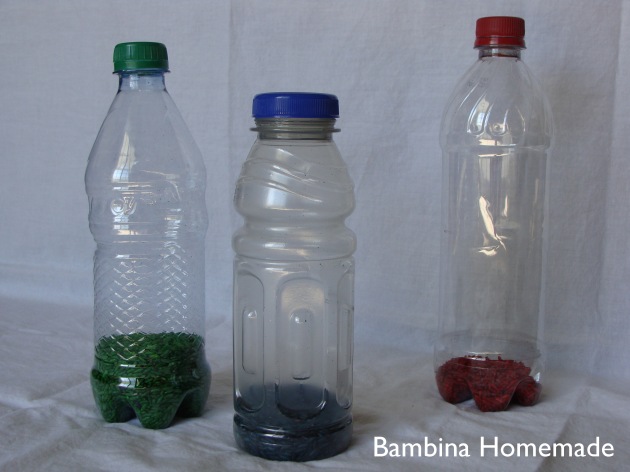
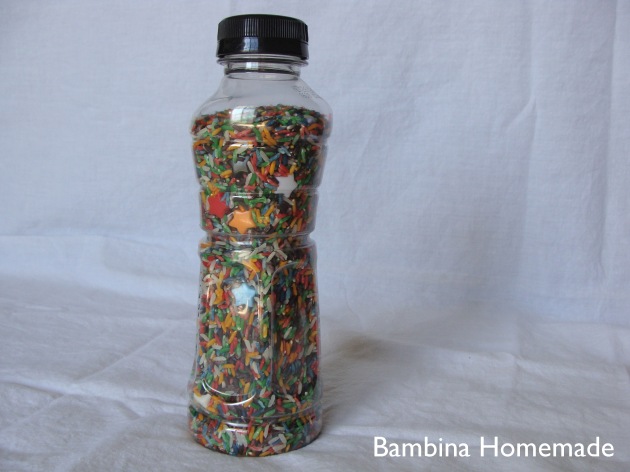
1.  For the 6mo+ crowd…  Shakers.  Dye rice different colors and put it in clean, dry water/juice/pop bottles.   You might want to superglue the lids on.


2.  For the 2+ crowd… I Spy tube.  Dye rice different colors and put it in clean, dry water/juice/pop bottle with beads and other small trinkets.  Again, you might want to superglue the lid on.  If you’re really ambitious, you can lay out all the trinkets and take a picture of them first so your bambina will have a reference card to check off all the bits as she finds them.


3.  For the preschooler+ crowd…  Sensory tub.  Dump it in a tub with other fun items such as small cups or measuring spoons.


4.  For the kindergarten+ crowd… Practice with letter formation or spelling practice.  Pour some rice out onto a sheet pan and let the bambina use a finger to practice making letters. (Though, I’ve heard this works better with salt or flour – of which you might also have some leftovers in your pantry if you’re going grain-free.)


(Since I used up all my rice in the shakers and I Spy tube, I had to smurf some images from other blogs.  Please give them some love for me!)


And now, how to dye rice (the easy way)…

Pour some rice into a big bowl.  Squirt some liquid food coloring on it.  Stir it around with a spatula until it’s all coated.  Pour the rice into a flat layer on a sheet pan lined with parchment paper.  Stick it in the oven at 200 degrees Fahrenheit for about an hour.  Let it cool.  Done!

I can’t vouch for the colorfastness of this rice if you’re going to be using it for hands-on activities with older bambini, but it works just fine if you’re locking it up in a plastic bottle.


Lovey Tutorial

How about a lovey for your little one?

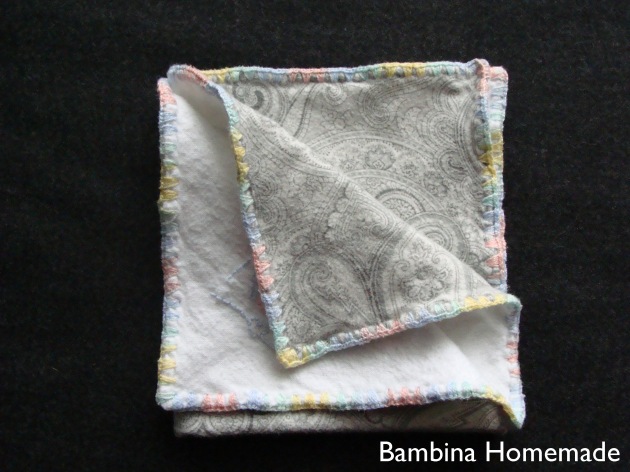
This blankie is made from super soft flannel with crocheted edges.

Personalize it by embroidering baby’s name or monogram on the back!

Here’s how to make a 12″ square lovey:

1.  Cut out two 13″ squares of flannel.

2.  Embroider baby’s name on one square using crochet thread in a contrasting color.  I put my bambina’s nickname diagonally across one corner with a swoop and a heart beneath.

3.  Stitch the two squares together, right sides facing.  Leave a 2″ section open and unstitched in the middle of one side for turning.

4.  Turn the blankie right side out and topstitch the turning hole closed.

5.  Crochet around the edge using the same contrasting crochet thread you used in step 2.  Here’s a great tutorial for how to crochet the edges.

Cuddle away!

Design Your Own Drape Neck (Nursing) Dress

I have recently rediscovered my love of dresses.  Unfortunately, it’s rather difficult (and a little too immodest for my taste) to pull up a dress to nurse – hence the need for dresses with necklines that are easy to pull down.  I decided to combine the easy access of the drape neck on one of my favorite shirts with the comfortable style of one of my favorite dresses.

As it turns out, drape neck tops are fantastic for nursing – even though I have never bought one with that purpose in mind.  Just stretch the drape over to the side and voila!  Nurse away, little bambina!

The easiest way for you to create this dress is to copy pieces you already have.  If, however, you don’t have pieces that match these, you can get adventurous, use pieces that fit you and are similar to these, and modify the pattern as we go (I’ll try to fill in the blanks as I can).  I’d recommend using a fitted tank top and A-line skirt.

Besides the pieces you’ll be copying, you will also need:

  • 2 yards of stretchy fabric – mine is a 95% rayon / 5% spandex knit
  • thread to match
  • clear elastic (the kind used for swimsuits)
  • tissue paper

First, create a paper pattern for the front of the bodice and then use that pattern to cut out the piece from the dress fabric.

Notice that the shirt drapes at the neckline because the neckline is square and much wider than the shoulders.  If you are copying a tank top, first mark where the waist and bottom of the armhole fall, and then curve the armhole out at the top to make the neckline go straight across.

Next, create a pattern piece and then cut out the back of the bodice.  I used the bodice front to figure out the length.  (No changes in directions for copying a tank top.)

Next up is the skirt, front and back.  To make these pieces, first you’ll need to do a little measuring.  Measure across the folded bodice (front or back – should be the same) at the waist.  We’ll call this measurement X.  Also measure how long the skirt piece is in the dress you’re copying – call this measurement Y.   (If you’re copying an A-line skirt, just measure down how long it is.  Keep in mind that we’ll be adding a ruffle later, so leave off about six inches from your skirt measurement.)

You will need two rectangles that are Y inches tall and 3X inches wide.

You should end up with a trapezoid that is 2X inches wide at the top, 3X inches wide at the bottom, and Y inches tall when measuring straight up (not along your diagonally cut sides).

Finally, cut out two rectangles for the ruffle.  They will be 6 inches tall by 4X inches long.

Cutting complete!  You should have these pieces.

Start assembly by attaching the ruffle pieces to the skirt pieces.

Next, we turn to the bodice back.

Now we deal with the bodice front.

We’ll attach the front to the back, starting at the shoulders.  (Do this step on each shoulder.)
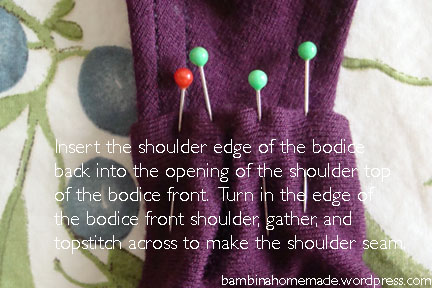
Finish the assembly by stitching the front and back together on the sides.

Done!

Comfort, style, and easy access to the goods.

You might notice that I never said to do anything to the bottom of the ruffle.  I left mine untouched, and since my fabric is a knit, I don’t have to worry about it unraveling.

Repurpose! T-shirt into bubble romper


Turn a Goodwill find into a cute little outfit!

Start by harvesting the main part of the shirt.

Shape the crotch/inseam.

We’ll create a solid foundation to attach snaps to later.

Now attach those pieces to the crotch.

Next, use elastic thread to cinch up the legs and create that bubble effect.

This next step will create the stretch around the top.

Now, add some straps to hold it up on her shoulders.

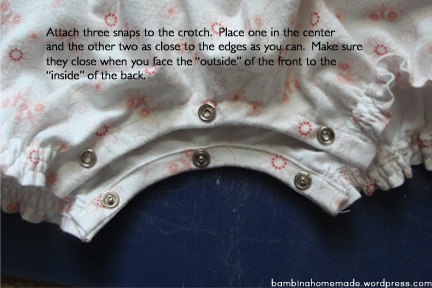
Finally, attach snaps to the crotch.

Tip:  I’d recommend that you switch where the snaps are attached – to the “inside” of the front and the “outside” of the back.  That way, when it’s closed, you don’t see the overlap from the front.  

Aside:  Of course, if I were going to make this again, I’d leave off the snaps entirely and just sew a panel in the crotch.  Why?  Because I HATE snaps.  Actively loathe them.  With my whole heart. Fortunately, with the top being so stretchy, it’s just as easy to pull the romper down from her shoulders for diaper changing.

And now my favorite part!  Put it on your bambina!

New Toy for Kitty

Poor Turkleton.  The bambina keeps getting new stuff… How about something for kitty?

Ok!

Does your favorite feline friend need a new toy?  Here’s how I made this one.

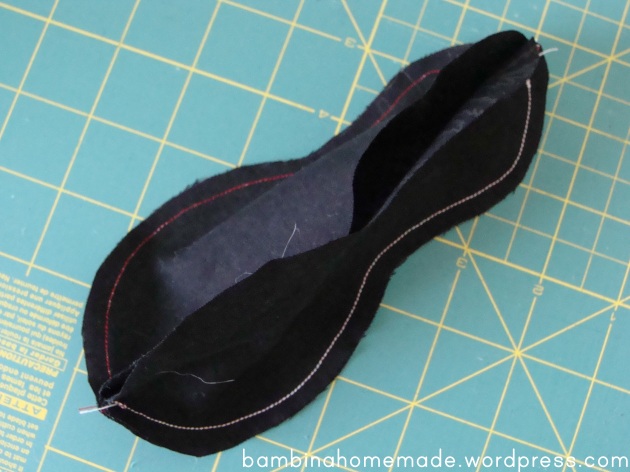
Cut out three of this shape from your favorite medium-weight fabric (I used a heavier quilting cotton).  I’d describe it as saying it’s a peanut shape with slightly pointy ends.

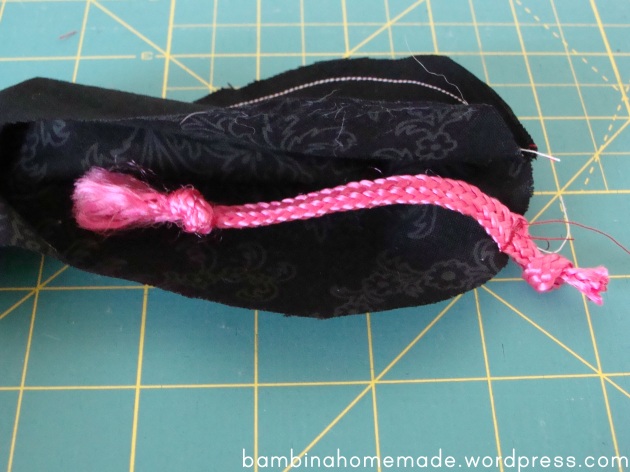
You’ll also need about six inches of rope.  Knot it at both ends.  (Mine was the handle from a shopping bag.  Yay for repurposing!)

You’ll also need a needle and thread, some stuffing, and some catnip.

Go ahead and sew two of the peanuts together, right sides together, from top to bottom with about a 1/4″ seam allowance.  Stitch the third to one of the other two, making sure to overlap the stitching at the top and bottom.

Lay the rope inside the shell with one knotted end slightly sticking out.  Stitch the rope to the edge of the big end of one of the peanut shapes.  Keep the stitching close to the edge, about 1/8″ away.

Stitch the final side seam, leaving an opening that’s a couple inches long.

Turn the toy right side out.  Put some catnip down in the ends and stuff the whole thing.

Slip stitch the opening closed.

Give it to kitty!

I realized after finishing that this would make a great turkey drumstick toy for the bambina to play with.  Just use brown felt and leave off the rope.  Fun toy at Thanksgiving time!

Mobile spirals

Repurpose! Knee-socks into Baby Leg Warmers

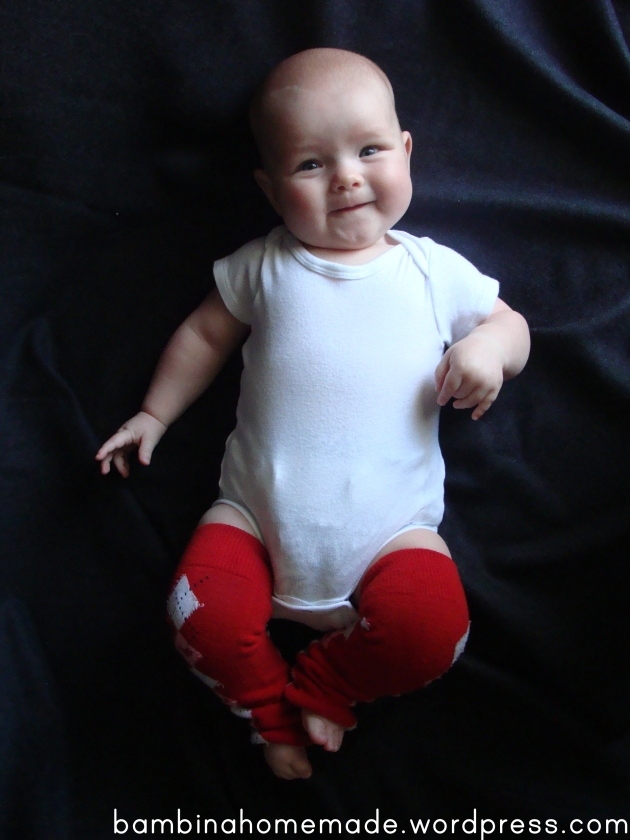
Have you got a baby with cold legs?  Have you got some old knee-socks that you’ve practically walked right through?  You could buy some fancy baby leg warmers for upwards of $10 a pop, or you could make your own!  I loved this project partly because I was able to complete the whole thing with photographs in under one nap (45 minutes).

I have been accused of hoarding socks in the past, and I will admit that I tend to keep them way past their prime.  I can’t help it – I love socks.  Funky, colorful, super-soft, warm… socks are pretty awesome.  And now that I’ve found a use for the ones that  somebody says I need to get rid of, vengeance is mine!

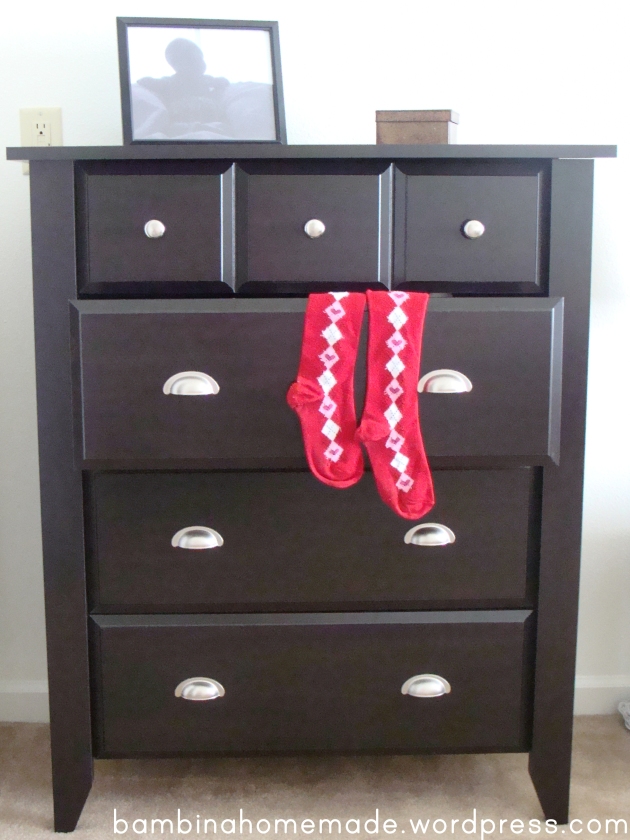
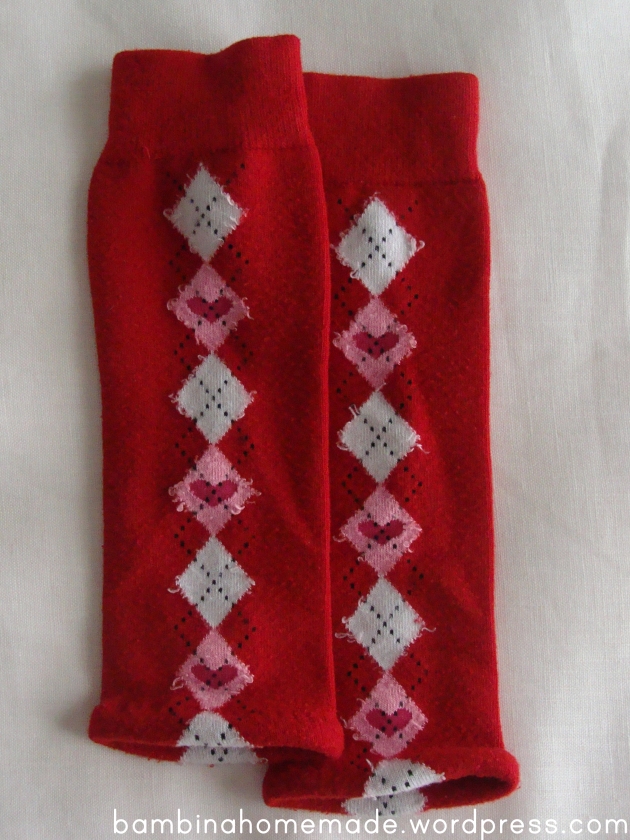
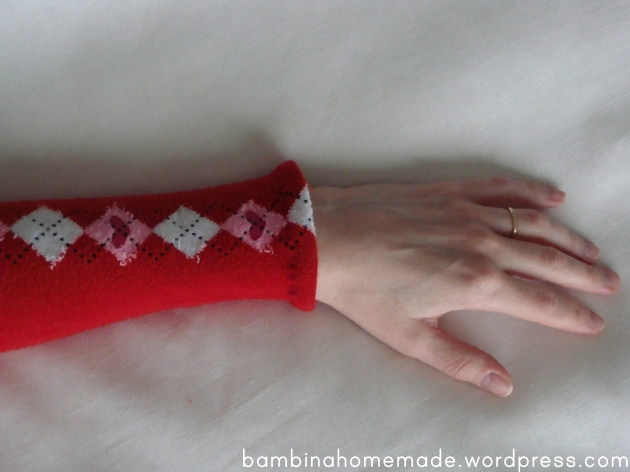
Ok, back to the tutorial.  First, track down some old socks.  Holes in the toes?  Heels threadbare?  No problem.  I found these old cuties buried in my sock drawer and thought, “The bambina would love pink and red argyle leg warmers!”  (Yep, they’re Valentine socks.  Quite possibly my favorite variety.)

Find the place where the leg meets the heel.   If your socks have a different color heel than leg, then you’ve got a super easy job!  If not, look for where the stitches change.  In mine, the stitches of the heel were smoother than the leg.

Your goal is to cut across the top of the heel.

Then, go ahead and cut straight across from there.

Flip it inside out.

Roll the cut edge up (or down, depending on how you have the sock laying in front of you) about 1/2 inch.  Then, flip under the cut edge up to the fold.  You’re effectively creating a roll that is about 1/4 inch that encases the cut edge.  (It was much easier to do it this way than to try to fold 1/4 inch and then fold over another 1/4 inch.  But if your sock makes it easier to do it that more traditional way, then more power to you!)  Pin the roll in place.

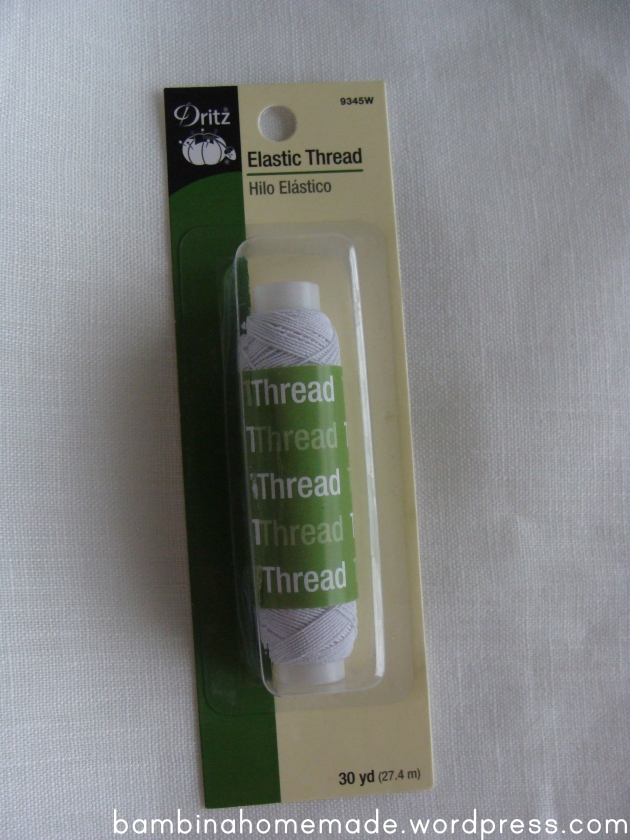
Grab some elastic thread.  Yep, you really do want elastic thread.  That will help maintain the stretchiness of the sock.  I found this in the elastic section (not the thread section) of my local fabrics and crafts store.

Cut yourself a piece of elastic that’s about four times the width of the sock (enough to wrap around twice without stretching).  Find a big old needle with an eye big enough to fit the elastic thread through.  (I think this was one I bought for tying quilts.)  Make one stitch through the roll and tie off the end, leaving a couple inches tail.  Use a slip stitch to sew the rolled hem down to the leg.  Pull the elastic taut, but don’t stretch it as you go.  Work your way around the sock, then tie the string to the tail you left at the beginning and trim off the extra.

Turn it right side out and you’re done!  Now, go make the other one!

DIY baby leg warmers!

“I love them, Mamma!”

Also useful as detachable sleeves!

Hey, take my picture, too!

Curtain Holdback Post

I can hardly believe that the bambina will be 5 months old tomorrow!  Until now, she’s been spending pretty much all of her sleepy time in Mamma and Papa’s room (except when Grandma’s here – in that case, she sleeps on Grandma).  We’ve all come to the conclusion that it’s pretty much time for her to move to her own room, but before that can happen, we need to get it ready!  Living in a quasi-tight apartment, we decided not to set up the nursery until we needed it.  After all, it’s taking over the room that previously served as office/guest room/craft space/in-apartment storage unit.  And neither Mamma nor Papa really wants to give up that room.

Anywho, besides the obvious furniture arrangements that need to be made, she will also need some heavy light-blocking curtains. That girl needs it dark to sleep!  But when we’re in there playing or reading stories, I want to use natural light.  Hence, we need a cute way to hold back those curtains.

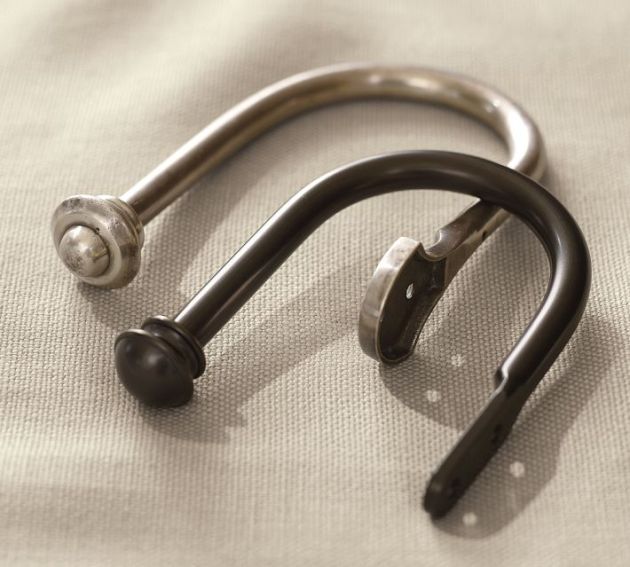
Now, I love the fancy holdbacks that you can buy from Pottery Barn…

or Restoration Hardware…

But I can’t afford $35 for the thing.

Especially when I have a drawer full of these…

Do you need to install a super-cute, ultra-cheap holdback for a curtain in your home?  Gather your supplies.  You’ll need one spool (I found an old cute wooden one in my drawer), a long wood screw, and your handy dandy electric drill (or a screwdriver and loads of elbow grease).

Hopefully there’s a nice stud near the window.

No, not that kind.  (But I wish!  True Blood can’t come back soon enough.)  Screw the spool into the wall, ideally into the stud.  If you don’t like the look of your spool, you could always paint it or Mod Podge something on it first.  I kind of like it plain, though – it’s kind of got that whole over-played shabby chic look going on.  (And also, the spool I found is from my husband’s late grandmother’s stash which I shamelessly raided lovingly commandeered a few years ago.  So I don’t think I could bring myself to do anything permanent to it.  When I found it in my drawer, it still had the price tag on it – 15¢!)

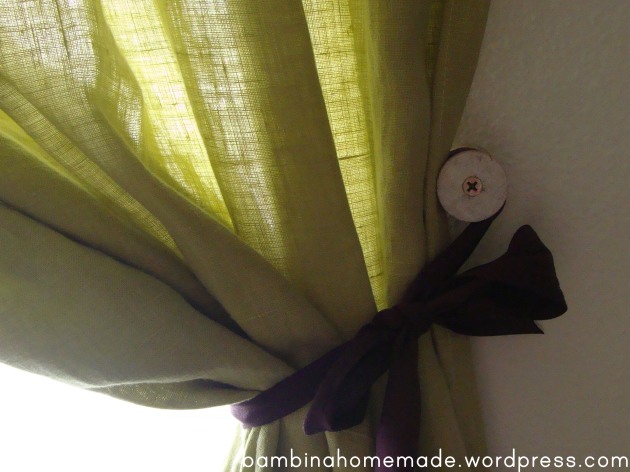
Ok, anyway.  Hang your curtain and wrap the tieback around your spool.

I used an eggplant-colored ribbon to hold back the chartreuse curtain.

You’re right, I’m definitely not a curtain stylist.

And no, that curtain doesn’t block the light at all.  I’ll have to track down some blackout fabric to line it before bambina can move in.  And hem it up some.  Don’t need her pulling it down on herself!

Ruby red booties!