How to Get Your Cloth-Diapered Baby to Poop, Part 2

How to Get Your Cloth-Diapered Baby to Poop, Part 1

Have you weaned that baby yet?

It’s Valentine’s Day, and Snarky Mamma would love to share something with you that she holds very dear to her heart: nursing her toddler.

So, in the spirit of the lovely folks who brought you Have you had that baby yet?, Snarky Mamma is proud to present her own little website about breastfeeding a toddler. Feel free to direct anyone inquiring about whether you’re still nursing to check it out.

Have you weaned that baby yet?

haveyouweanedthatbabyyet.tumblr.com

Then, check out these posts about the benefits of breastfeeding a toddler (or older baby):

http://www.thealphaparent.com/2012/03/diagram-of-breastfed-toddler.html

http://kellymom.com/ages/older-infant/ebf-benefits/

https://breastfeedingusa.org/content/article/thinking-about-weaning

http://www.llli.org/faq/advantagetoddler.html

How to Throw a Gluten-Free First Birthday Party in Winter

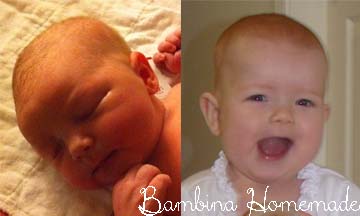
Some mamas would start this post by saying they can’t believe how fast the first year went and they can’t believe their baby is already one. Yes, I feel that way, too, but I’ll save you the schmaltz.

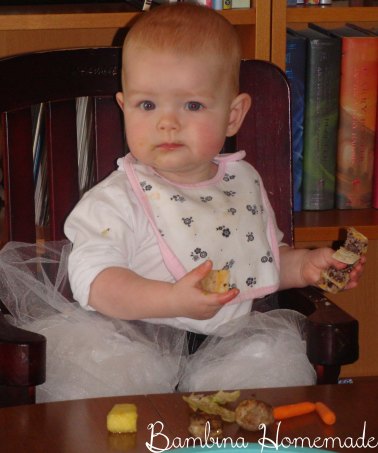
Except for this. Just look!

gluten-free-winter-first-birthday

This post is about how we celebrated our baby’s first birthday just a few days before Christmas without it feeling like an extension of the winter holiday season.

The party was held in Tiny Apartment Land during the lunch hour on a cold December day, so the food had to be warm, filling, and easy to eat. And gluten-free.

The decorations needed to be reusable. As little waste as possible, please. And not wintry or Christmasy. So down came the snowflakes and stockings.

On my first trip to the party store, I found my inspiration: these cheery cupcake liners with polka dots in robin’s egg blue, apple green, golden yellow, and pumpkin orange.

gluten-free-winter-first-birthday

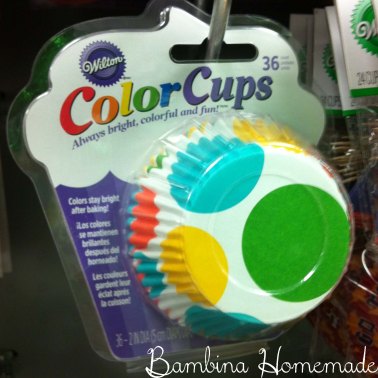
Armed with a distinct color story, I felt like maybe I could pull off a non-Christmasy party three days before Christmas.

Decorations
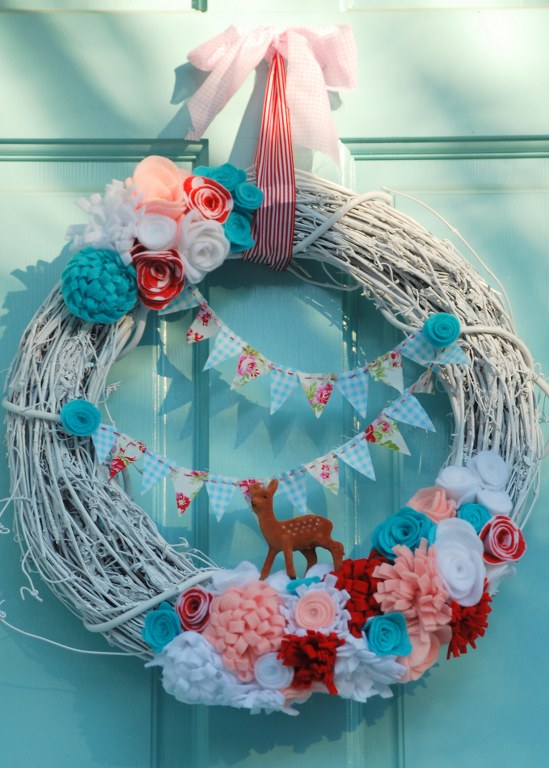
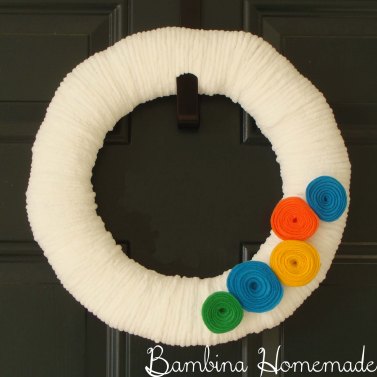
A special new wreath on the front door featuring felt flowers in the party’s colors. (It’s the same base I’m using now for the Valentine’s Day wreath. I wrapped a straw wreath in super fuzzy white yarn and made felt rosettes to match the party’s color story.)

gluten-free-winter-first-birthday

A special book for guests to sign (Dr. Seuss’s Happy Birthday to You!). We are a bookish sort of family, so what better way to commemorate the first anniversary of our little bookworm’s hatching?

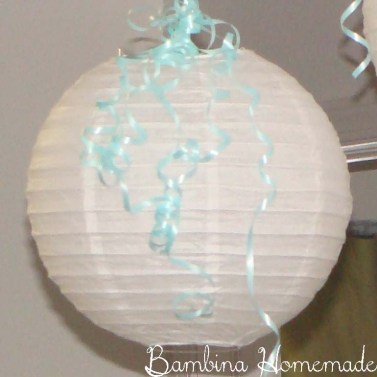
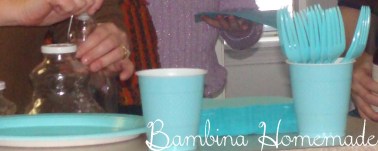
Paper lanterns & robin’s egg blue tableware (disposable, sadly) – but the lanterns were later repurposed to nursery decor.

gluten-free-winter-first-birthday

gluten-free-winter-first-birthday-tableware

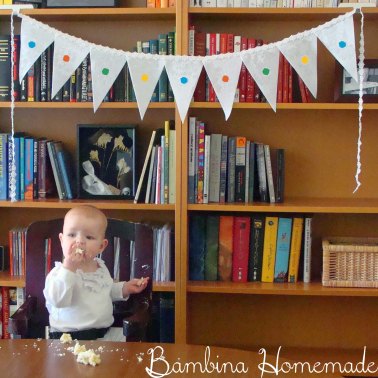
Name bunting above the birthday girl’s high chair. (I Photoshopped out her name here, for privacy, but you can see the colors that each letter came in.)

gluten-free-winter-first-birthday-bunting

Cupcake toppers featuring the birthday’s girl mugshot.

gluten-free-winter-first-birthday-cupcakes

The menu
Sauceless Swedish meatballs (made with gluten-free bread crumbs).

A variety of roll-ups (black beans with roasted red pepper hummus, ham with brie, and turkey with guacamole) all on gluten-free tortillas.

Fresh fruit and veggie trays.

Corn tortilla chips with salsa.

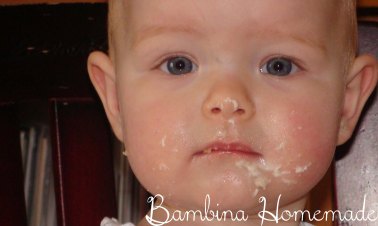
Cupcakes (made with Bob’s Red Mill vanilla cake mix) with buttercream frosting. Yes, even the Bambina got to eat one. She later threw most of it back up. After months of breastmilk spit-up, I had happily forgotten what real barf smelled like. I’ll take sour milk anyday.

gluten-free-winter-first-birthday-menu

Keeping it waste-less (not quite waste-free)
The invitations were sent via email.

The paper lanterns, bunting, and flowers on the wreath became nursery decorations. (Is it called a nursery when the little girl who sleeps there isn’t technically a baby anymore? She is still nursing, but we do that all over the place…)

Leftover food was shared at the very-extended-family Christmas dinner the next day and unopened packages of the disposable tableware were returned to the store.

Happy birthday, baby girl!

We take our cake very seriously around here.

gluten-free-winter-first-birthday-serious

Time goes so fast…

4 Ideas for a Valentine’s Day Wreath

In the interest of decorating for the season, we’re keeping a wreath up on the door. All year. That’s my one resolution.

Here are a few ideas I found for inspiration.

Cute bunting!

valentine-wreath-bunting-rosettes

Valentine’s Wreath from My So Called Crafty Life

Gorgeous rosettes (presumably felt).

valentine-wreath-bunting-rosettes

Valentine Wreath from WreathinkGifting on Etsy

Love the yarn-wrapped look.

valentine-wreath-bunting-rosettes

Valentine’s Love Wreath from Loving Every Second

And here’s what I ended up doing:

valentine-wreath-bunting-rosettes

Valentine’s Day Wreath by Bambina Homemade

I wrapped a straw wreath with fuzzy white yarn (the super-soft velvety kind that’s marketed for baby blankets), stuck on some pink rosettes, and draped a bunting with my and Papa’s initials. Cheesy? Yes. Seasonal? Definitely.

If only it would hang straight on the door.

Graphic t-shirt dress

Now that Summer has officially left town (this morning’s snow showers should confirm it), I guess I should show you how I made this cute summery dress.  You might make one with long sleeves for your little sweetie and then pair it with some cute leggings, or maybe you can plan ahead for the next warm season.

First, grab a graphic tee you want to convert.

I wanted to make this an envelope shoulder style dress, since Bambina still hates having tight tops pulled over her head.  See the pic below for how I cut the main bodice piece (front and back) and skirt section.

You’ll need some facing along the neckline.  Use the top of the bodice as a guide to cut two pieces that are each about an inch tall.   Fold them in half, and cut one of them more deeply at the center.

Harvest the sleeves from the shirt.  Fold over the shoulder overlap at your desired height.  Lay a sleeve with its top fold aligned with the shoulder fold, under the bodice by at least half an inch.  Trace the edge of the bodice armhole onto the sleeve, including a quarter inch down the side (this little line is critical – it will tell you where to align the bodice when you’re attaching them).  Cut the sleeve leaving a quarter inch seam allowance along the curve of the armhole and then going straight from there.  Copy the curve and the little line to the other side of the sleeve.  Use the first sleeve as a template to make the second.  Make sure you copy your markings as well!

Attach the facing to the bodice.  The more deeply cut piece will be attached to the front.  Turn them right sides together.  Match the top of the shoulders and smooth the facing piece down and towards the center.  Pin in place, and stitch with an 1/8″ seam allowance along the top of the facing.  Trim the excess of the bodice off from above the facing.  Turn the seam right sides out and topstitch the facing down using a 3/8″ seam allowance.  Repeat on the back, except without any trimming (the facing should line up with the top of the back exactly).

Sleeves.  Yeah, attaching sleeves to overlap/envelope shoulders is a pain.  But you can do it.  First we do the back bodice piece.  Right sides together, line up the corner of the armhole  with the end of your mark on one side of the sleeve.  Pin it along the edge until you reach the top edge of the bodice piece.  Now, line up the corner of the armhole of the front bodice piece with the other end of the mark on the sleeve and pin it together.  The overlap will appear as you pin, creating a sleeve – back bodice – front bodice sandwich.  Stitch between the marks.

Close the bodice, front to back.  Fold the bodice right sides together and pin along the sides and the underpart of the sleeves.  Stitch the sides and sleeves in one long seam on each side.  Clip the inner corners of the underarms.

Putting it all together.  Measure across the bottom of the bodice.  Double this measurement and cut this length of 1/4″  elastic.  Pin the ends of the elastic to one side seam of the skirt, and then pin the elastic equally around the top of the skirt in several places.  Attach the elastic to the skirt using a long zigzag stitch, and pulling the elastic taut as you run it and the skirt through your machine.  (Don’t stretch the skirt – just pull the elastic so its length matches the fabric of the skirt.)   Insert the bodice (right side out) into the skirt (inside out) – they will be turned right sides together with the waist of the bodice meeting the elastic edged waist of the skirt.  Pin them together at the waist and stitch around, again using a long zigzag, and making sure they are even as they go through the machine.

Turn it all right side out.  Done!  Admire your work!

Snarky Mamma talks about her baby’s sensitive tummy

Fall’s inspiring colors

There was an amazing thunderstorm yesterday afternoon, but the rain paused for just a few minutes right as the Bambina was waking up from her nap.  So I grabbed the camera and we did a little puddle-stomping.

Alright, I did the stomping.  She was content to be in the carrier.

And no, I didn’t actually stomp in any puddles, but I still managed to soak the bottom of my pants.

Here are a few of the beautiful colors we found.


4 ways to use up the rice left in your pantry when you go grain-free

I’ve recently discovered how much better I feel when I don’t eat grain.  But what to do with all that rice that was left in the pantry?   Glad you asked!  Here are the four uses I’ve found so far…

1.  For the 6mo+ crowd…  Shakers.  Dye rice different colors and put it in clean, dry water/juice/pop bottles.   You might want to superglue the lids on.


2.  For the 2+ crowd… I Spy tube.  Dye rice different colors and put it in clean, dry water/juice/pop bottle with beads and other small trinkets.  Again, you might want to superglue the lid on.  If you’re really ambitious, you can lay out all the trinkets and take a picture of them first so your bambina will have a reference card to check off all the bits as she finds them.


3.  For the preschooler+ crowd…  Sensory tub.  Dump it in a tub with other fun items such as small cups or measuring spoons.


4.  For the kindergarten+ crowd… Practice with letter formation or spelling practice.  Pour some rice out onto a sheet pan and let the bambina use a finger to practice making letters. (Though, I’ve heard this works better with salt or flour – of which you might also have some leftovers in your pantry if you’re going grain-free.)


(Since I used up all my rice in the shakers and I Spy tube, I had to smurf some images from other blogs.  Please give them some love for me!)


And now, how to dye rice (the easy way)…

Pour some rice into a big bowl.  Squirt some liquid food coloring on it.  Stir it around with a spatula until it’s all coated.  Pour the rice into a flat layer on a sheet pan lined with parchment paper.  Stick it in the oven at 200 degrees Fahrenheit for about an hour.  Let it cool.  Done!

I can’t vouch for the colorfastness of this rice if you’re going to be using it for hands-on activities with older bambini, but it works just fine if you’re locking it up in a plastic bottle.